

Welcome to the Motivation Monday series from Not Just CAD!
Here we go, Motivation Monday #009!
It’s the start of another week in lockdown for me here in the UK, and I’m sure most of you are currently working from home due to this nasty Coronavirus (COVID-19), and I sincerely hope you and all your family members are safe and well.
I have had some very positive responses to my LinkedIn Learning courses, especially about my Cert Prep course for working towards Revit Certification using Revit For Architectural Design. That got me thinking about one thing I often get asked about, and that is roofs in Revit.
You can go wild with roofs in Revit but there is one little thing that often flummoxes Revit users and that is how to get a gable end roof. You know that type of roof where that flat wall goes up to the roof apex like this?
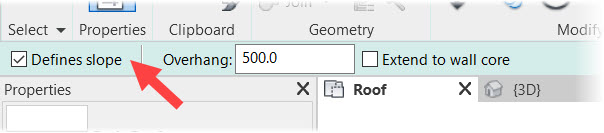
Revit automatically defines a slope from each wall you select in your roof plan when placing your roof from a footprint, and when you select Roof by Footprint from the Build panel in the Architecture tab on the Revit ribbon, you will see the Defines Slope box ticked in the Options bar.

Due to this default setting, when you sketch your roof in your roof plan, like in the image below, the slopes are indicated by the triangles.
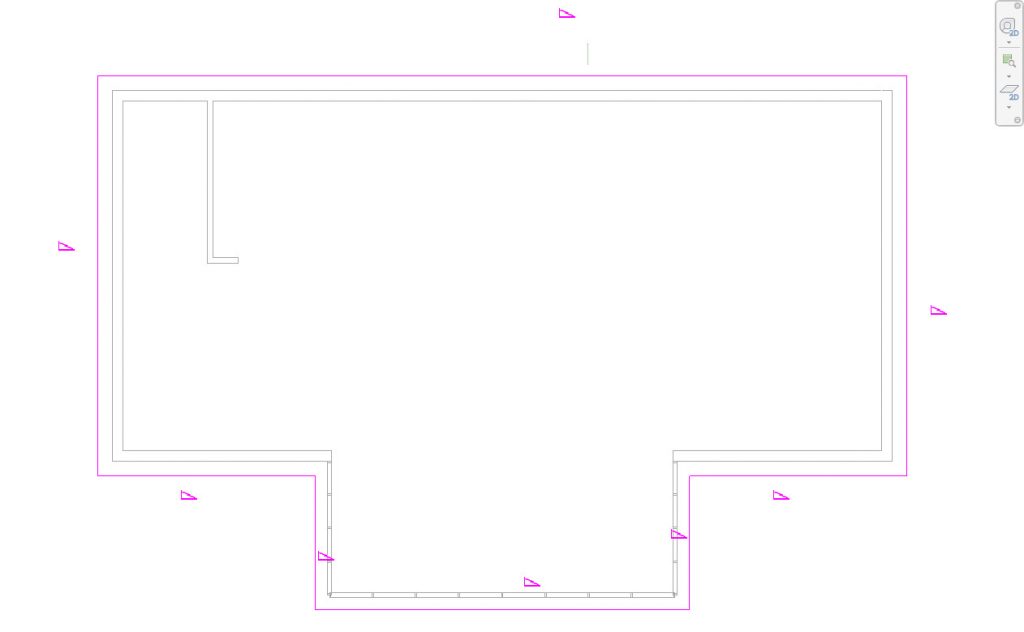
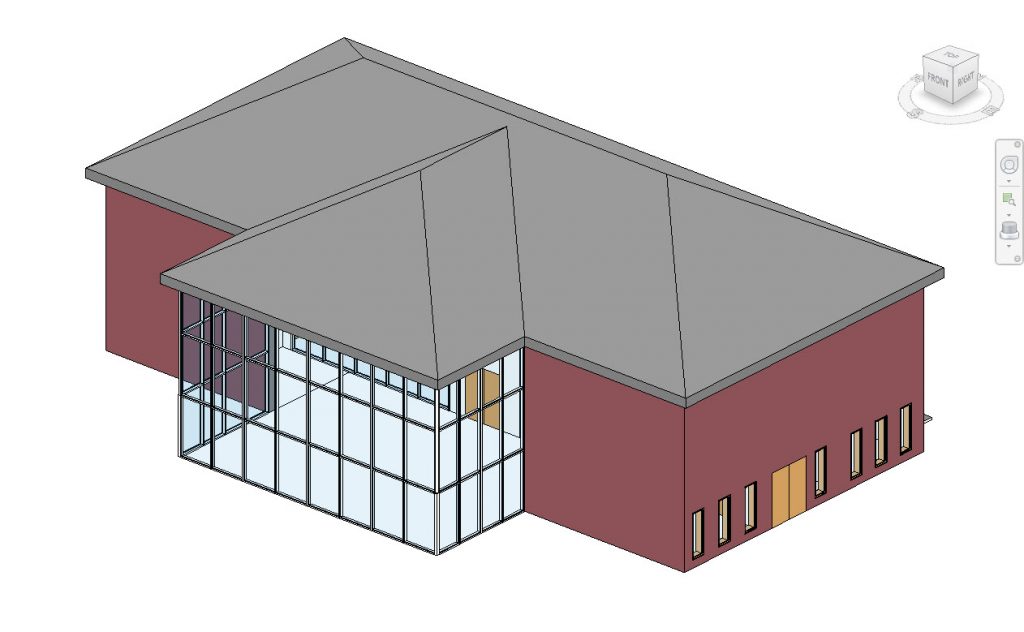
Upon confirming your roof sketch, you end up with a roof like this.
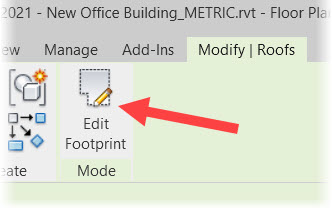
To create a gable end roof, you need to switch off the Defines Slope option on a roof gable end. Select your roof in your roof plan, and select Edit Footprint in the contextual Modify tab.
You will go back to sketch mode. Select the roof edge you want the slope removed from, and then untick Defines Slope; either in the Options bar or in the Properties palette, as shown below.
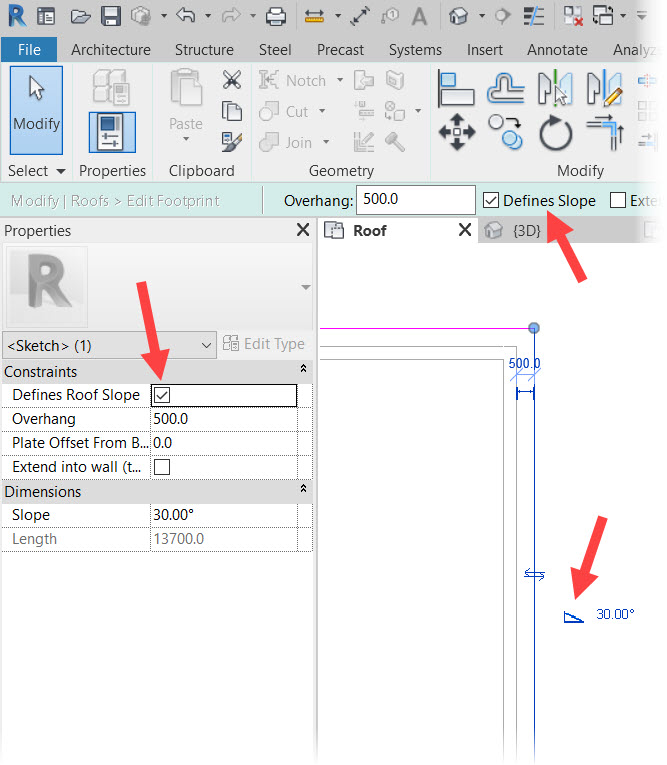
You then need to confirm in sketch mode by clicking on the green tick. You have now removed your slope on that roof edge. In my case it is the East roof edge in my Revit model.
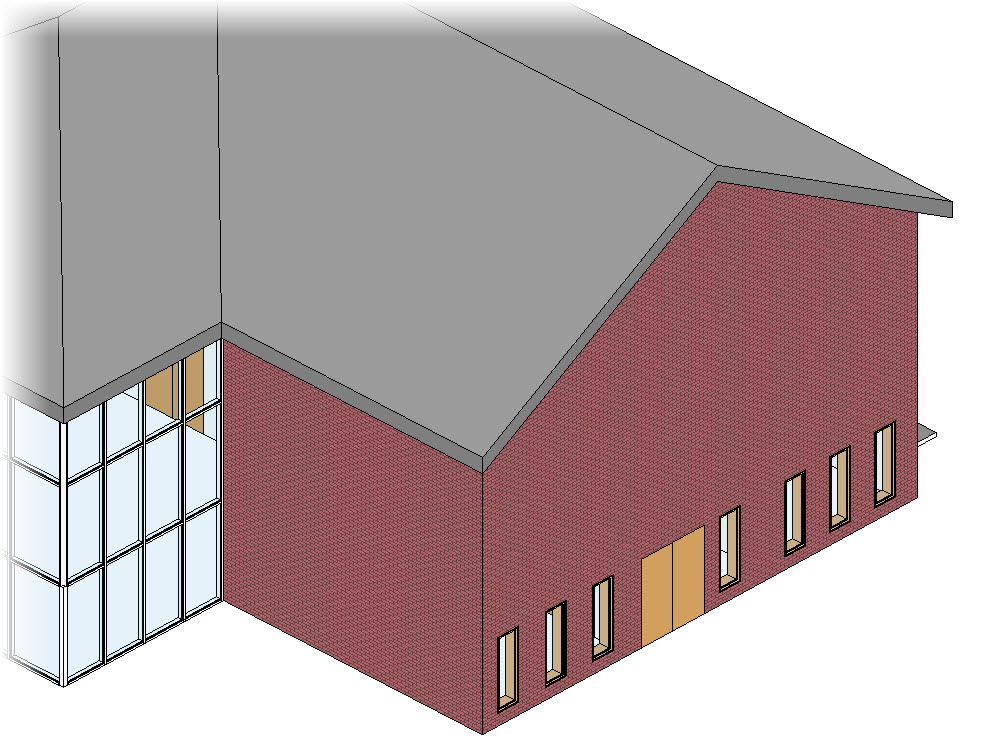
If I jump into a 3D view of my Revit model, it now looks a bit weird though. Have any of you experienced this before?
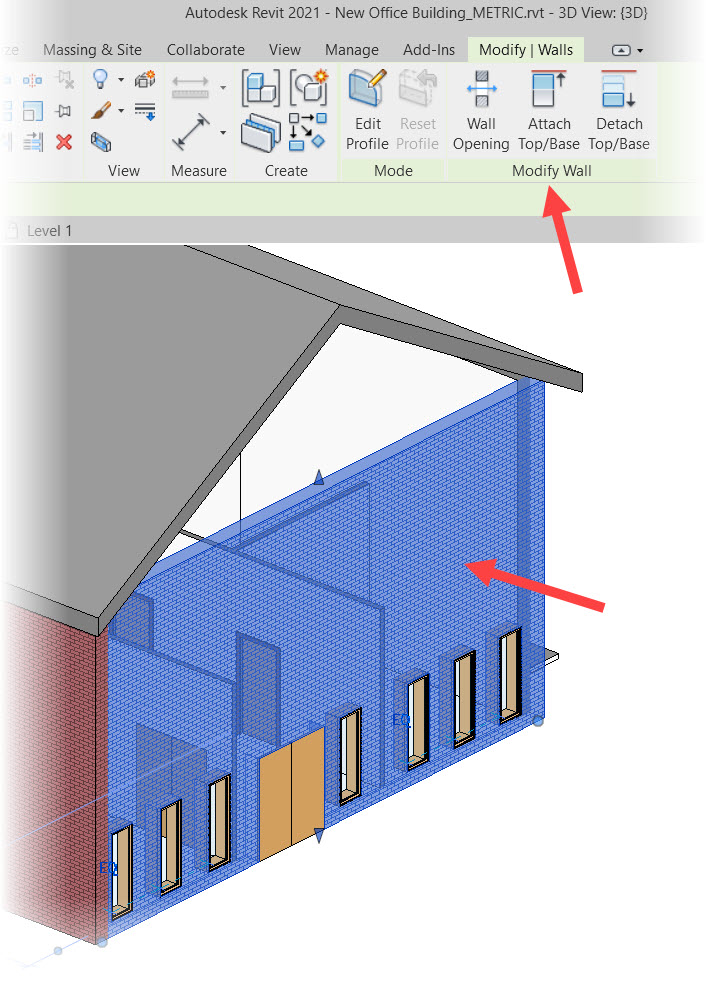
How do you get your gable end wall to match up to your roof edge that does not have a defined slope anymore?
It is simple (he says). You just need to know where to look. Just select your wall in question, and use the Attach Top/Base command in the contextual Modify | Walls tab.
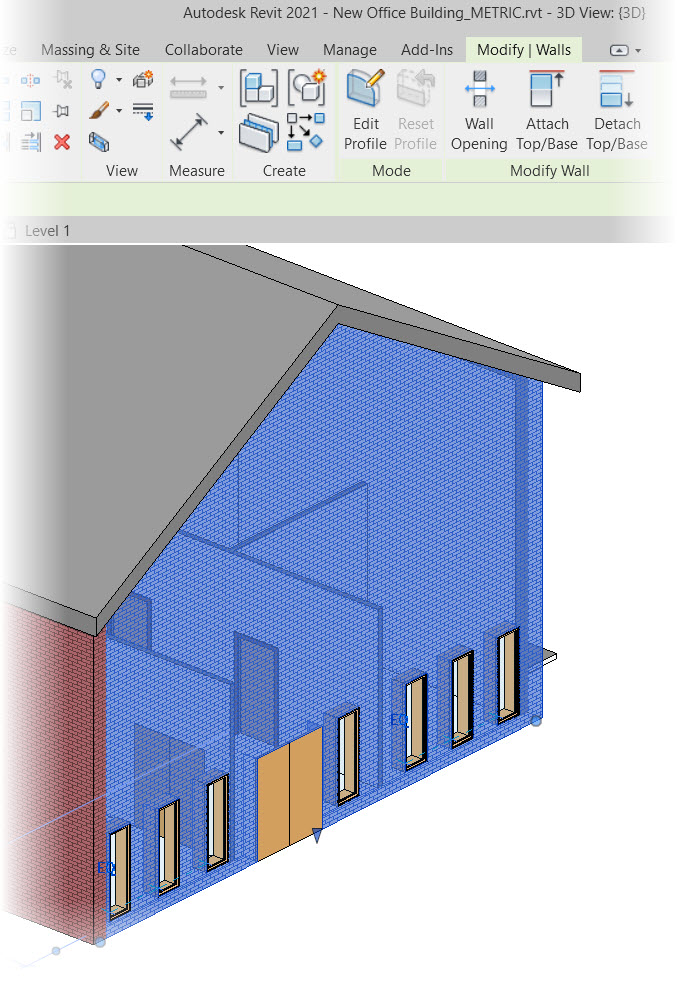
Then, select the roof you want your wall to attach to.
Hey presto! The wall attaches to the selected roof, giving you that elusive gable end wall!
I have created a short video covering this neat little Revit function, and it is hosted on the CADFMconsultants YouTube channel, and you can view the video below: –
If you want to learn more about Revit, please be aware that CADFM are an Autodesk Authorized Training Center (ATC), and we are happy to provide you with a virtual classroom via Microsoft Teams if you need it.
Just email us at training@cadfmconsult.co.uk and we will make sure to get back to you to discuss any training/learning requirements you may have!
It is Monday. Stay safe. Be motivated. 😉
SCB.
PS – You can also discover the skills you need to become a Revit Certified Professional in my LinkedIn Learning course here. Check it out and other Revit titles in the library!
PPS – Check out how to optimize your BIM workflow in Revit too, by taking my course in the LinkedIn Learning library here!
(DISCLOSURE: Certain links in this blog are affiliate links that earn me a small commission).