
Welcome to the new Fantastic Friday series from Not Just CAD!
Every Friday, I will post you a tip or trick you can use in AutoCAD, Revit, PlanGrid, and/or other CAD and BIM tools from Autodesk that will allow you to have a Fantastic Friday feeling before the weekend (and maybe even a Super Saturday feeling during the weekend too!)
So here goes. Fantastic Friday numero FIVE.
When you are working with camera views in Revit, you sometimes want to change the detail level or the visual style. Not only can the visual style enhance a camera view but sometimes (if the detail level is changed), it can make for a view that looks stunning as well, especially if you take it to the next level and render the view as well.
This can all be done via the View Control bar, bottom left of the Revit screen.

The detail level icon is to the right of the word ‘Perspective’ and the visual style icon is to the right of the detail level icon.
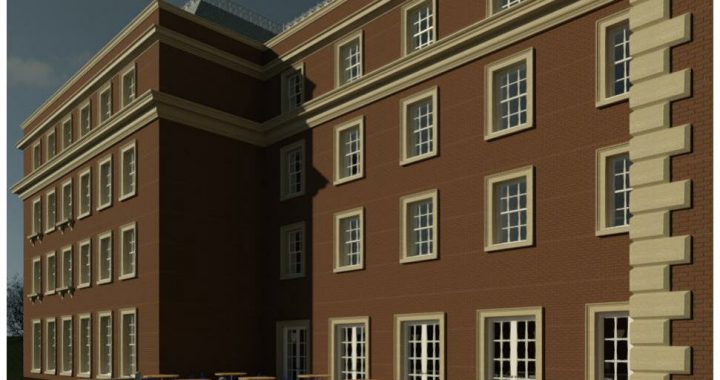
Upon clicking on the detail level icon, you will be greeted with THREE detail levels: Coarse, Medium and Fine and their effects on your camera view are obvious. Go with Coarse and things like brickwork patterns won’t be displayed. See the camera view below, which is set to Coarse and a visual style of Hidden Line.
As you can see, there is no brickwork and the Hidden Line visual style has no colour either.
Let’s change that.
If we set the detail level to Fine, and change the visual style to Realistic, you will see an obvious change to the camera view.
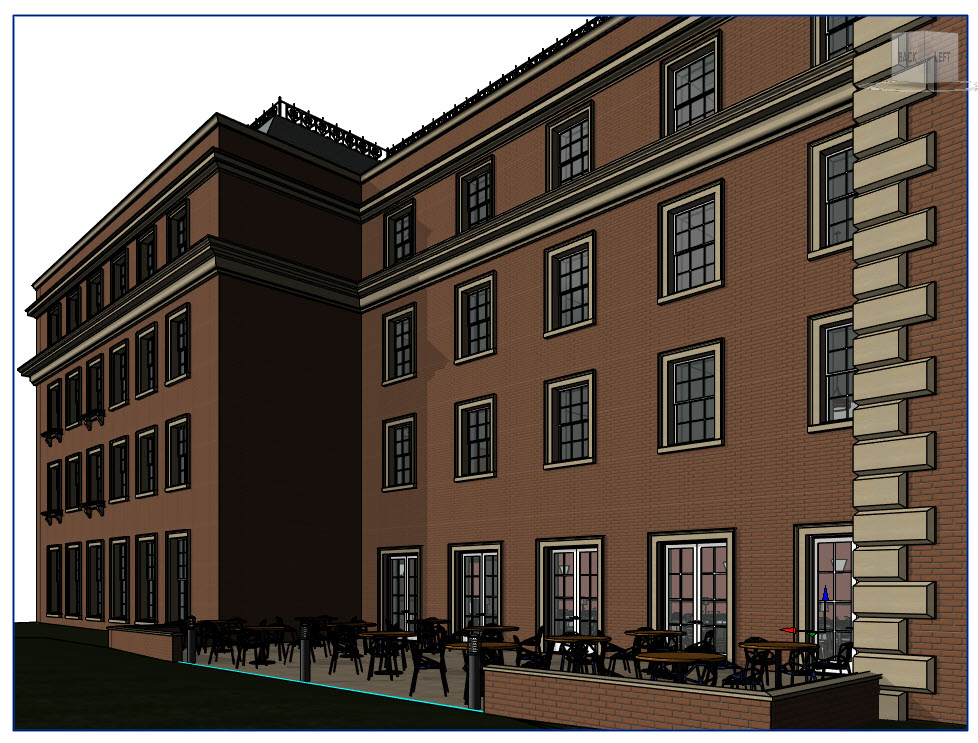
The camera view looks almost real-life, but bear in mind, with the colour from the Realistic visual style and the Fine detail setting, it can take longer to regenerate when you’re working in that view. That does depend on your graphics card (graphic processing unit – GPU). If you are using a suitable GPU such as from AMD or NVIDIA, that is normally not an issue, but lower specification GPUs may struggle.
You can also render the camera view with appropriate view controls being set.
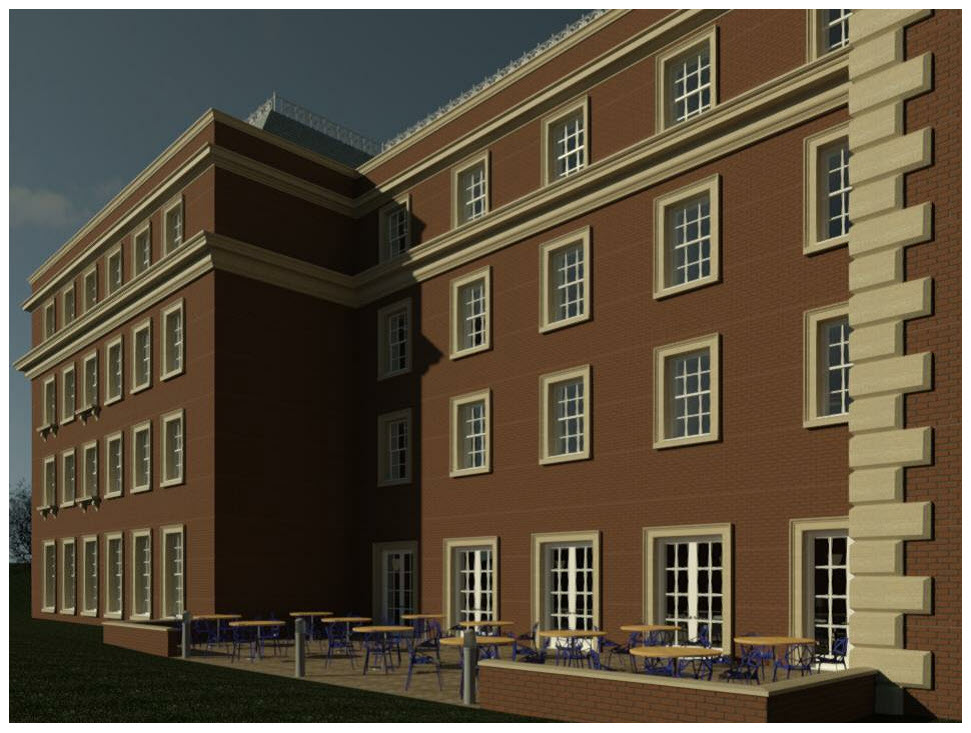
The above image shows a render using the default Best quality render settings in Revit, with some sky and lighting. Looks great doesn’t it?
So, there you go. View Controls in Revit.
It’s Fantastic Friday.
Be fantastic. 😉
(Do you want to be an Autodesk Certified Professional in Revit? Check out my Revit Certification Prep course on LinkedIn Learning here for more great Revit workflows and techniques!)
Have a great weekend!
SCB.