
Welcome to the new Motivation Monday series from Not Just CAD!
Every Monday, I will post you a tip or trick you can use in AutoCAD, Revit, PlanGrid, and/or other CAD and BIM tools from Autodesk that will motivate you to do better on a dreary Monday back at work.
Here we go! Motivation Monday #006.
How many of you know about annotative dimensions in AutoCAD?
I am sure many of you do. But did you also know that you can utilize your locked viewports in your layout tabs to add annotative scales to your dimension objects in your drawings?
All you need to do is make sure that your viewports are locked and set to the appropriate scales.

The layout shown above has TWO locked viewports; the left viewport is at 1:1 and the right viewport is at 2:1. If these viewports remain locked, their viewport scale cannot be changed.
You can check if they are locked and at the right viewport scale down on the AutoCAD status bar. Select a viewport by clicking on its edge. It will go blue and display its grips. I have selected the right viewport.

If you look at the status bar you will see this: –

The little blue padlock icon indicates that the viewport is locked. If you click on the padlock icon you can toggle it as locked or unlocked. Blue and a closed padlock indicates locked. Grey and an open padlock indicates unlocked.
You will also notice that the viewport scale (in this case, 2:1) is greyed out and cannot be changed. This is because the viewport is locked.
So, how can I add annotative dimensions in a viewport?
It’s a very easy workflow and it saves time because when you add annotative dimensions via an active viewport, AutoCAD adds the annotative object scales to your dimension objects automatically.
Make sure your viewport is NOT selected. Then, double-click inside the LOCKED viewport boundary. It must be locked, and I cannot stress that enough. Start messing around with unlocked active viewports and all sorts of chicanery can start to happen!
(Also, should you zoom in and out, just make sure you can still see an edge of your viewport so that you know where to double-click to DEACTIVATE the locked viewport too).
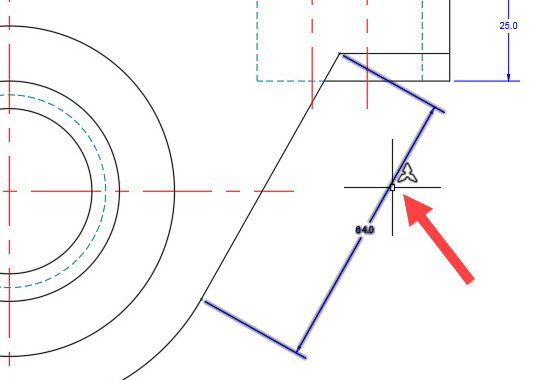
You will see the viewport boundary go bold, and you can now move your crosshair around in the viewport.
Make sure you are using an ANNOTATIVE dimension style. You can spot these by the little triangular annotative symbol (it’s meant to be a scale rule in section, I believe).
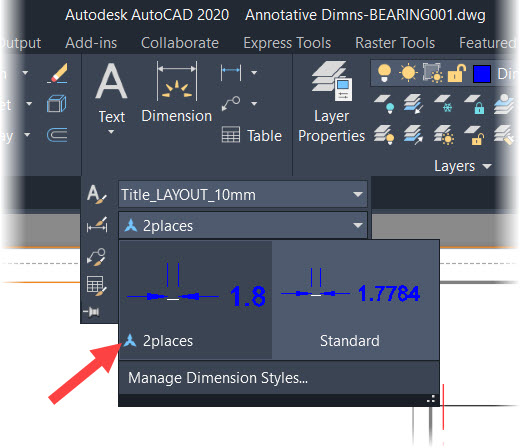
As you can see, 2places is the annotative dimension style in this case. Using that style, you can now start to place annotative dimensions in the active viewport.
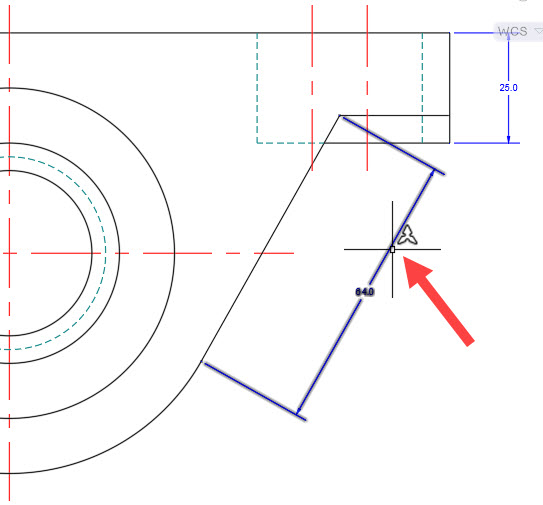
You can see an aligned dimension and a linear dimension already placed. You will notice that if you hover over an annotative dimension, the annotative symbol displays. Should you have more than one annotative object scale applied, there will be two annotative symbols showing.
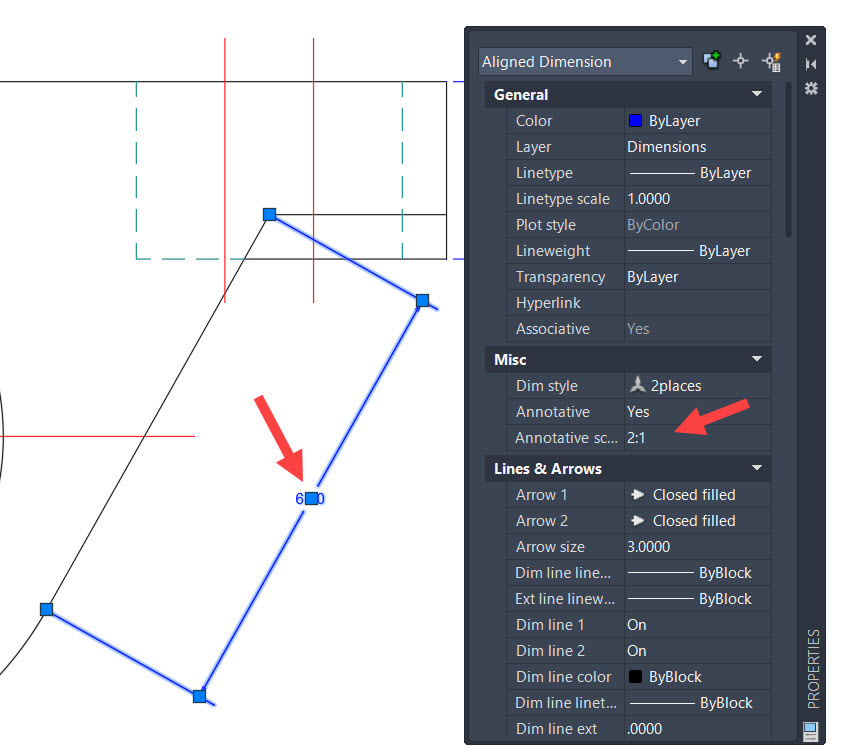
In a nutshell, I have now shown you how to place an annotative dimension in a 2:1 scaled viewport. You can now check your dimension object properties and you will see that AutoCAD has automatically applied the appropriate annotation object scale.
So, there you go. Annotative dimension object scales. Added using an active LOCKED viewport in your layouts.
It’s Monday. Be motivated. 😉
Stay safe out there, everyone.
SCB.
PS – Did you know that you can also use ANNOTATIVE scaling across ALL your AutoCAD drawings? Check out my LinkedIn Learning course here to take your annotative dimensioning to the NEXT level in AutoCAD!
PPS – Don’t forget to vote for my classes at AU London 2020! You can find the voting page here. I hope to see you in London in June!