
Welcome to the new Motivation Monday series from Not Just CAD!
Every Monday, I will post you a tip or trick you can use in AutoCAD, Revit, PlanGrid, and/or other CAD and BIM tools from Autodesk that will motivate you to do better on a dreary Monday back at work.
I’m sure most of you are currently working from home due to this nasty Coronavirus (COVID-19) situation. It’s a whole new normal, and I sincerely hope you and all your family members out there are safe and well.
In the UK, we are being told to stay 2 metres apart (2000mm), and it got me thinking. How could be utilize AutoCAD to implement that? Well, you could use the MOVE or COPY commands and some Direct Distance Entry, but what about the Rectangular Array (ARRAYRECT) command?
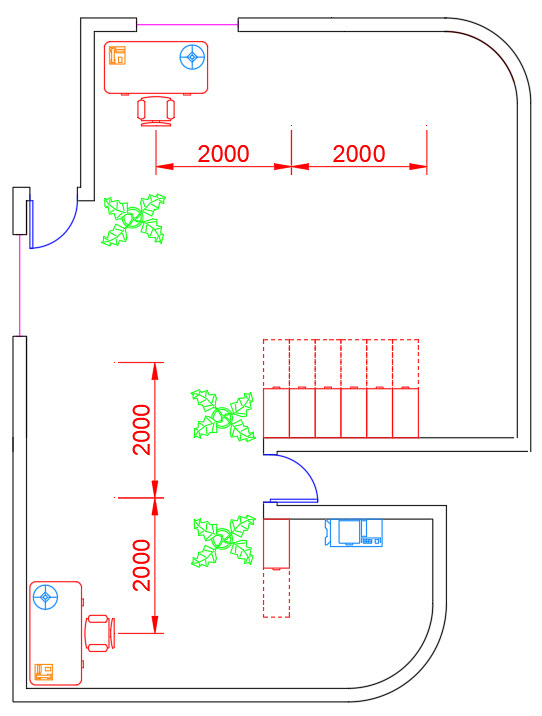
Imagine a small home office layout where you need to adapt to the current guidelines being proposed. The image below should give you an idea.
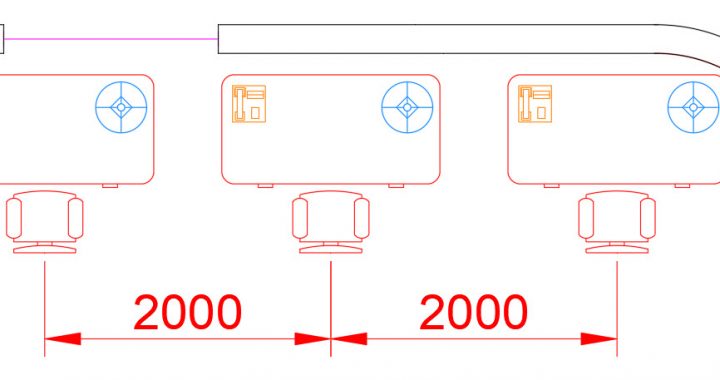
As you can see, you would ensure that the chair centres are 2000mm apart. That is just a nominal distance and used for this exercise. In real life, it could be different. Let’s focus on the top (horizontal) layout first. Please note the larger than life dimensions are there purely for clarity.

You would select the chair, desk, phone and desklamp (using noun/verb selection), and then click on the Rectangular Array (ARRAYRECT) command on the Array flyout in the Modify panel on the Home tab on the AutoCAD ribbon.

Yes, you will think that you have pressed the wrong button as it all looks a bit surreal with desks everywhere! Don’t panic (in the immortal words of Douglas Adams). All you need to do is change a few parameters in the command.

Right-click and select Spacing on the shortcut menu, as the centres of the chairs don’t tally up with the 2000mm spacing.

Then use the Midpoint object snap on the back of the leftmost chair. Drag along to the right using Polar Tracking for accuracy and then type 2000 and press ENTER.

You will see the chairs then tally up to the new spacing.
Now check the ribbon. You will see that you are now in the contextual Array Creation tab. You can see the Column Spacing is set to 2000 as you previously set, but some of the default values for Rows and Columns need to be changed.

I’ve changed them to the following settings: –

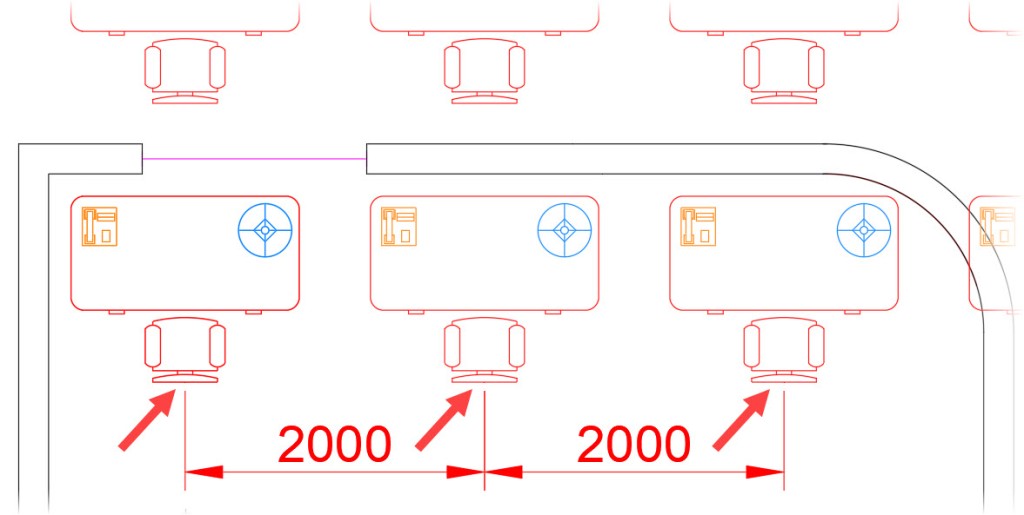
You will notice now that I have only ONE row and THREE columns and the columns are spaced to the necessary 2000.
You can now simply click on the big green tick mark to Close Array or right-click and select eXit on the shortcut menu.

Your array is now placed.

You could now perform the same workflow on the vertical desk arrangement but substitute it as THREE rows and ONE column with a row spacing of 2000mm this time. Just make sure that you right-click and select Rows, not Columns for your spacing.

So, there you go. The Rectangular Array (ARRAYRECT) command.
It’s Monday. Stay safe. Be motivated. 😉
SCB.
PS – Did you know that you can learn so much more about AutoCAD in my AutoCAD Essential Training course in the LinkedIn Learning library here? Check it out and gain more valuable AutoCAD knowledge!
PPS – Don’t forget to vote for my classes at AU London 2020! You can find the voting page here. Just search for ‘Shaun Bryant’ in the Search box! I hope to see you in London in December!