
Welcome to the new Motivation Monday series from Not Just CAD!
Every Monday, I will post you a tip or trick you can use in AutoCAD, Revit, PlanGrid, and/or other CAD and BIM tools from Autodesk that will motivate you to do better on a dreary Monday back at work.
So here goes…..Motivation Monday numero uno.
How many times have you dimensioned up a drawing using the wrong layer? More to the point, how many dimensions have you placed on the incorrect layer before realizing that you have done so? It’s frustrating, right? Especially on a Monday.

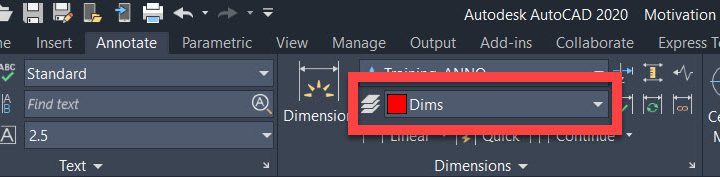
Well, there’s a great new feature in later versions of AutoCAD that gives you the peace of mind to know that all your dimension annotation is on the correct layer and that’s the Dim Layer Override (DIMLAYER) function.
You will find it on the Annotate tab on the AutoCAD ribbon on the Dimensions panel.

Simply click on the dropdown and select your dimension layer. From there on in, all your dimensions will be on THAT layer, thus removing that worry of them being on the incorrect layer.

Obviously, you will still need to update any dimensions still on the wrong layer, but at least you know now how to make sure it doesn’t happen again.
So, there you go. It’s Monday. Be motivated. 😉
Happy CADD’ing!
SCB.
PS – Don’t forget to share with the hashtag #NJCmotivationmonday!